

Views: 315 Author: NANJING TAIDUN Publish Time: 2026-09-27 Origin: Site
Content Menu
● Introduction: Why Chain and Tire Net Installation Defines Fender Performance
● Understanding Chain and Tire Net (CTN): The Protective Armor for Pneumatic Fenders
>> What Exactly Is a Chain and Tire Net?
>> Key Components of a CTN System
● The Strategic Value of CTN Installation: Five Non-Negotiable Benefits
>> 1. Dramatically Extended Fender Service Life
>> 2. Enhanced Energy Absorption and Load Distribution
>> 3. Compliance with ISO 17357 Standards
>> 4. Corrosion Resistance in Harsh Marine Environments
>> 5. Simplified Maintenance and Component Replacement
● Pre-Installation Preparation: The Foundation of Successful CTN Deployment
>> Site and Equipment Inspection Checklist
>> Material Selection: Chains, Tires, and Corrosion Protection
● Step-by-Step Installation Guide: Installing Chain and Tire Net for Yokohama Fenders
>> Step 1: Fender Positioning and Preparation
>> Step 2: Horizontal Chain Placement
>> Step 3: Vertical Chain Weaving
>> Step 4: Rubber Sleeve Installation
>> Step 6: Net Attachment to Fender Flanges
>> Step 7: Inflation and Tension Adjustment
>> Step 8: Final Inspection Checklist
● Common Installation Mistakes and How to Avoid Them
● Maintenance Protocol: Extending CTN and Fender Service Life
>> Inspection Schedule (ISO 17357 Recommendations)
● OEM Considerations: Sourcing Quality Chain and Tire Nets
>> What to Look for in an OEM Manufacturer
>> Customization Options for OEM Partners
>> 1. Can I add a chain and tire net to an existing pneumatic fender?
>> 2. What is the difference between Type I and Type II pneumatic fenders?
>> 3. How often should I inspect the chain and tire net?
>> 4. What chain material is best for marine environments?
>> 5. How do I know if my fender needs a CTN replacement?
>> 6. Can CTN fenders be stored outdoors?
>> 7. What is the typical lifespan of a CTN-equipped fender?
● Conclusion: Precision Installation Delivers Long-Term Performance
Yokohama fenders—also known as pneumatic rubber fenders—represent the gold standard in marine collision protection. But here's what many procurement managers and port engineers overlook: the chain and tire net (CTN) is not merely an accessory. It's the difference between a fender that lasts 3 years and one that performs reliably for 15+ years.
Installing a chain and tire net for Yokohama fenders is a precision operation that directly impacts energy absorption efficiency, abrasion resistance, and overall safety compliance with ISO 17357 standards. This guide provides a comprehensive, step-by-step approach to CTN installation—written for marine engineers, port maintenance teams, and OEM procurement specialists who demand engineering-grade precision.
Whether you're retrofitting existing pneumatic fenders or specifying new units from an OEM manufacturer, this article delivers the technical depth and practical insights you need.
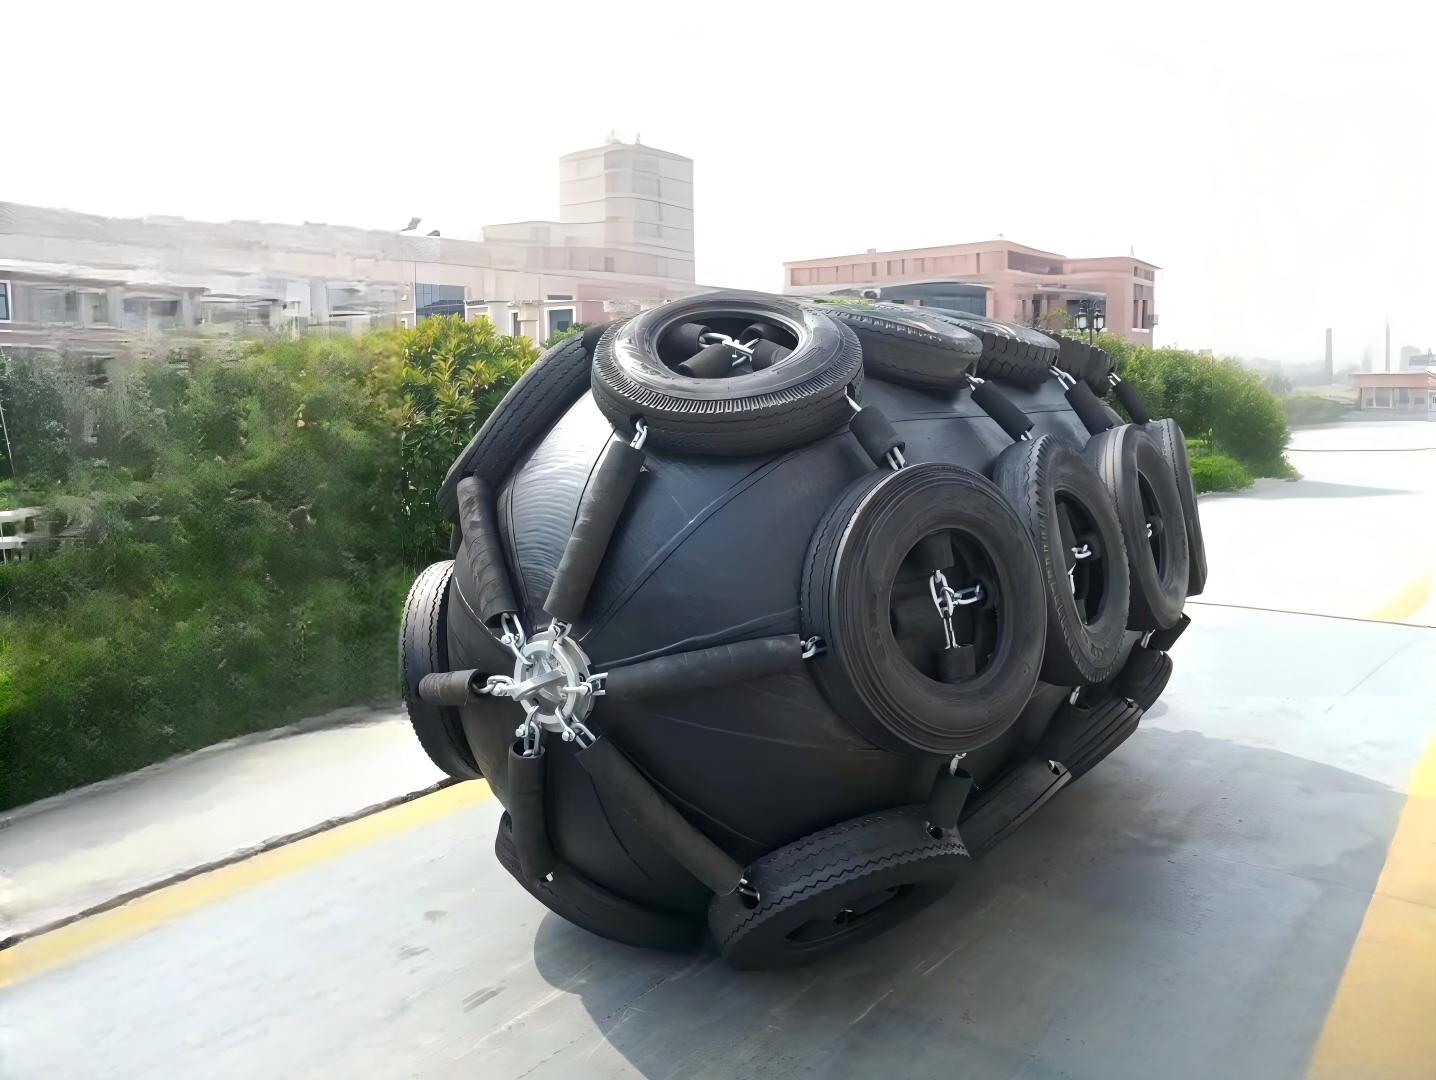
A chain and tire net is a protective mesh system constructed from heavy-duty chains interwoven with recycled tires (typically truck or aircraft-grade) and reinforced with rubber sleeves. This outer shell wraps around the pneumatic fender body, creating a sacrificial layer that absorbs abrasion, deflects sharp impacts, and distributes berthing forces across a wider surface area.
According to ISO 17357 classification, pneumatic fenders fall into two primary types:
| Type | Designation | Description |
|---|---|---|
| Type I | Chain & Tyre Net (CTN) | Full external protection with chain-tire net |
| Type II | Sling Type | Simpler construction with attachment eyes |
The CTN configuration is the most widely deployed in demanding marine environments—ship-to-ship (STS) transfers, offshore terminals, and high-traffic ports—because it delivers superior protection against the relentless wear of marine operations.
Every properly constructed chain and tire net consists of:
- Horizontal chains: Form the structural framework, running longitudinally along the fender
- Vertical chains: Interwoven with horizontal chains to create the mesh pattern
- Tires: Positioned at chain intersections, absorbing direct impact energy
- Rubber sleeves: Placed where chains contact the fender body to prevent metal-to-rubber abrasion
- Shackles and swivels: Connect the net to the fender's end flanges
- Guy chains/ropes: Secure the fender to the dock or vessel
Critical insight: The quality of these components—particularly the chain material (Q235HDG, SUS304, or SS316)—determines the CTN's service life in corrosive marine environments.
The chain and tire net acts as a sacrificial barrier. Without it, the rubber fender body absorbs every abrasive contact, every sharp edge, and every UV-degrading ray. With a CTN, those forces are intercepted before they reach the pressurized rubber core.
Industry data: Fenders equipped with proper CTN protection routinely achieve 10-15 years of operational service, compared to 3-5 years for unprotected fenders in high-contact applications.
The CTN doesn't just protect—it optimizes performance. By spreading berthing forces across multiple contact points (tires and chains), the net reduces peak stress on any single area of the fender body. This results in:
- More predictable energy absorption curves
- Reduced risk of localized deformation
- Better performance in angled or sliding berthing scenarios
For OEM manufacturers and port authorities alike, ISO 17357 compliance is non-negotiable. The standard explicitly specifies CTN requirements for Type I pneumatic fenders, including:
- Net coverage density
- Chain strength specifications
- Attachment point integrity
- Marking and traceability requirements
A properly installed CTN is not optional—it's a certification requirement for many international tenders and classification society approvals.
Marine environments destroy metal. Salt spray, humidity cycling, and constant immersion accelerate corrosion. Hot-dip galvanized chains (minimum 130 microns coating) and stainless steel options (SUS304/SS316) provide the corrosion resistance necessary for multi-year deployment.
A well-designed CTN allows modular replacement of worn components. Damaged tires can be swapped without replacing the entire net. Corroded chains can be replaced individually. This maintainability dramatically reduces lifecycle costs compared to unprotected fenders, which often require complete replacement when the rubber body is compromised.
Before any installation begins, conduct a thorough pre-installation inspection:
Fender Condition Assessment
- [ ] Verify fender body is undamaged (no cuts, punctures, or soft spots)
- [ ] Check inflation valve and safety valve for proper function
- [ ] Confirm end flanges and attachment points are structurally sound
- [ ] Record serial number and manufacturing date for traceability
CTN Component Verification
- [ ] Inspect all chains for corrosion, broken links, or deformation
- [ ] Verify tires are intact and properly sized for the fender
- [ ] Check shackles, swivels, and thimbles for wear or missing pins
- [ ] Confirm sufficient rubber sleeves are available
Equipment and Tools
- [ ] Inflation pump (electric or manual) with calibrated pressure gauge
- [ ] Lifting equipment (crane or winch) rated for fender weight
- [ ] PPE: Safety harness, gloves, hard hat, protective footwear
- [ ] Anti-seize compound for shackle threads
Environmental Conditions
- [ ] Avoid installation during adverse weather (high winds, heavy rain, rough seas)
- [ ] Ensure adequate lighting if working at night
- [ ] Confirm safe working platform (dock, vessel deck, or dry dock)
Chain Specifications
| Material | Application | Corrosion Resistance | Cost |
|---|---|---|---|
| Q235HDG | Standard marine | Good (hot-dip galvanized) | Moderate |
| SUS304 | High-corrosion environments | Excellent | Higher |
| SS316 | Extreme marine/chemical exposure | Superior | Highest |
Tire Selection
- Truck tires: Standard for most fender sizes (1.0m–3.3m diameter)
- Aircraft tires: For heavy-duty or high-contact applications
- Rubber sleeves: Mandatory where chains contact the fender body to prevent abrasion
Critical reminder: Never use mixed materials without verifying galvanic compatibility. Dissimilar metals accelerate corrosion in marine environments.
1. Lay the fender flat on a clean, level surface free of sharp objects
2. Partially deflate the fender (to approximately 0.2 bar / 2.9 psi) to make net fitting easier
3. Clean the fender surface to remove dirt, debris, or marine growth
4. Align the fender so its longitudinal axis matches the net orientation
1. Unroll the horizontal chains along the length of the fender
2. Space them evenly around the circumference (typical spacing: 4–8 chains depending on fender diameter)
3. Ensure equal tension across all horizontal chains—slack chains will shift during operation
1. Weave vertical chains over and under the horizontal chains
2. Maintain consistent spacing (typically 300–500mm intervals)
3. Follow the fender's curvature—the net should conform to the body without gaps or bunching
4. Secure intersections temporarily with cable ties or rope
Visual reference point: The completed mesh should resemble a diamond or square pattern with uniform coverage across the entire fender surface.
1. Slide rubber sleeves onto chains at every point where the chain will contact the fender body
2. Position sleeves at least 50mm on either side of potential contact areas
3. Secure sleeves to prevent sliding during operation
Why this matters: Direct metal-to-rubber contact creates abrasion points that can lead to premature fender failure. Rubber sleeves eliminate this risk.
1. Position tires at chain intersections (where vertical and horizontal chains meet)
2. Orient tires outward so they face the approaching vessel
3. Secure tires using chain links or heavy-duty fasteners
4. Verify even spacing—uneven tire distribution causes uneven load distribution
1. Attach shackles to the fender's end flanges or designated attachment points
2. Connect swivels to prevent chain twisting during operation
3. Secure guy chains to the outer shackle points for mooring
4. Tighten all connections to manufacturer specifications
Critical safety check: Verify that all shackle pins are fully seated and mousing wire (where required) is installed to prevent loosening.
1. Inflate the fender slowly to its working pressure (typically 50 kPa or 80 kPa)
2. Monitor net tension as the fender expands—the net should become snug but not over-tight
3. Adjust chain tension using turnbuckles or tensioners if available
4. Allow 30 minutes for pressure stabilization, then re-check
- [ ] All shackles properly pinned and secured
- [ ] Rubber sleeves positioned correctly at all contact points
- [ ] Tires evenly spaced and securely attached
- [ ] Net tension uniform around the fender
- [ ] Fender pressure at specification (verified with calibrated gauge)
- [ ] No air leaks detected (listen for hissing, check valve connections)
Chain Maintenance
- Remove rust with wire brush; apply rustproof paint or anti-corrosion coating
- Replace any chain with broken links, severe corrosion, or >10% wear
- Lubricate swivels to ensure smooth rotation
Tire and Rubber Sleeve Maintenance
- Replace cracked or missing tires immediately
- Fiber ropes can serve as temporary replacements for missing rubber sleeves
- Remove marine growth (barnacles, seaweed) during inspections
Pressure Management
- Check internal pressure at least annually with calibrated gauge
- Adjust for temperature variations (pressure increases ~1% per 3°C rise)
- Store deflated to 0.2 bar when not in use
For brands, distributors, and procurement specialists sourcing chain and tire net fenders, evaluate:
1. ISO 17357 Certification: Not just claimed—verifiable through third-party inspection
2. Material Traceability: Documentation for chain grade and tire specifications
3. Testing Capabilities: In-house pressure testing, tension testing, corrosion testing
4. Production Scale: Capacity to handle large or recurring orders
5. Export Experience: References from similar markets and applications
- Chain material: Hot-dip galvanized, SUS304, SS316
- Tire type: Truck, aircraft, or custom
- Net configuration: Standard diamond, heavy-duty, or custom patterns
- Branding: Custom markings, serial numbers, certification plates
- Packaging: Export-ready crating with documentation
Typical lead time: 4–8 weeks for custom OEM orders (depending on size and quantity)
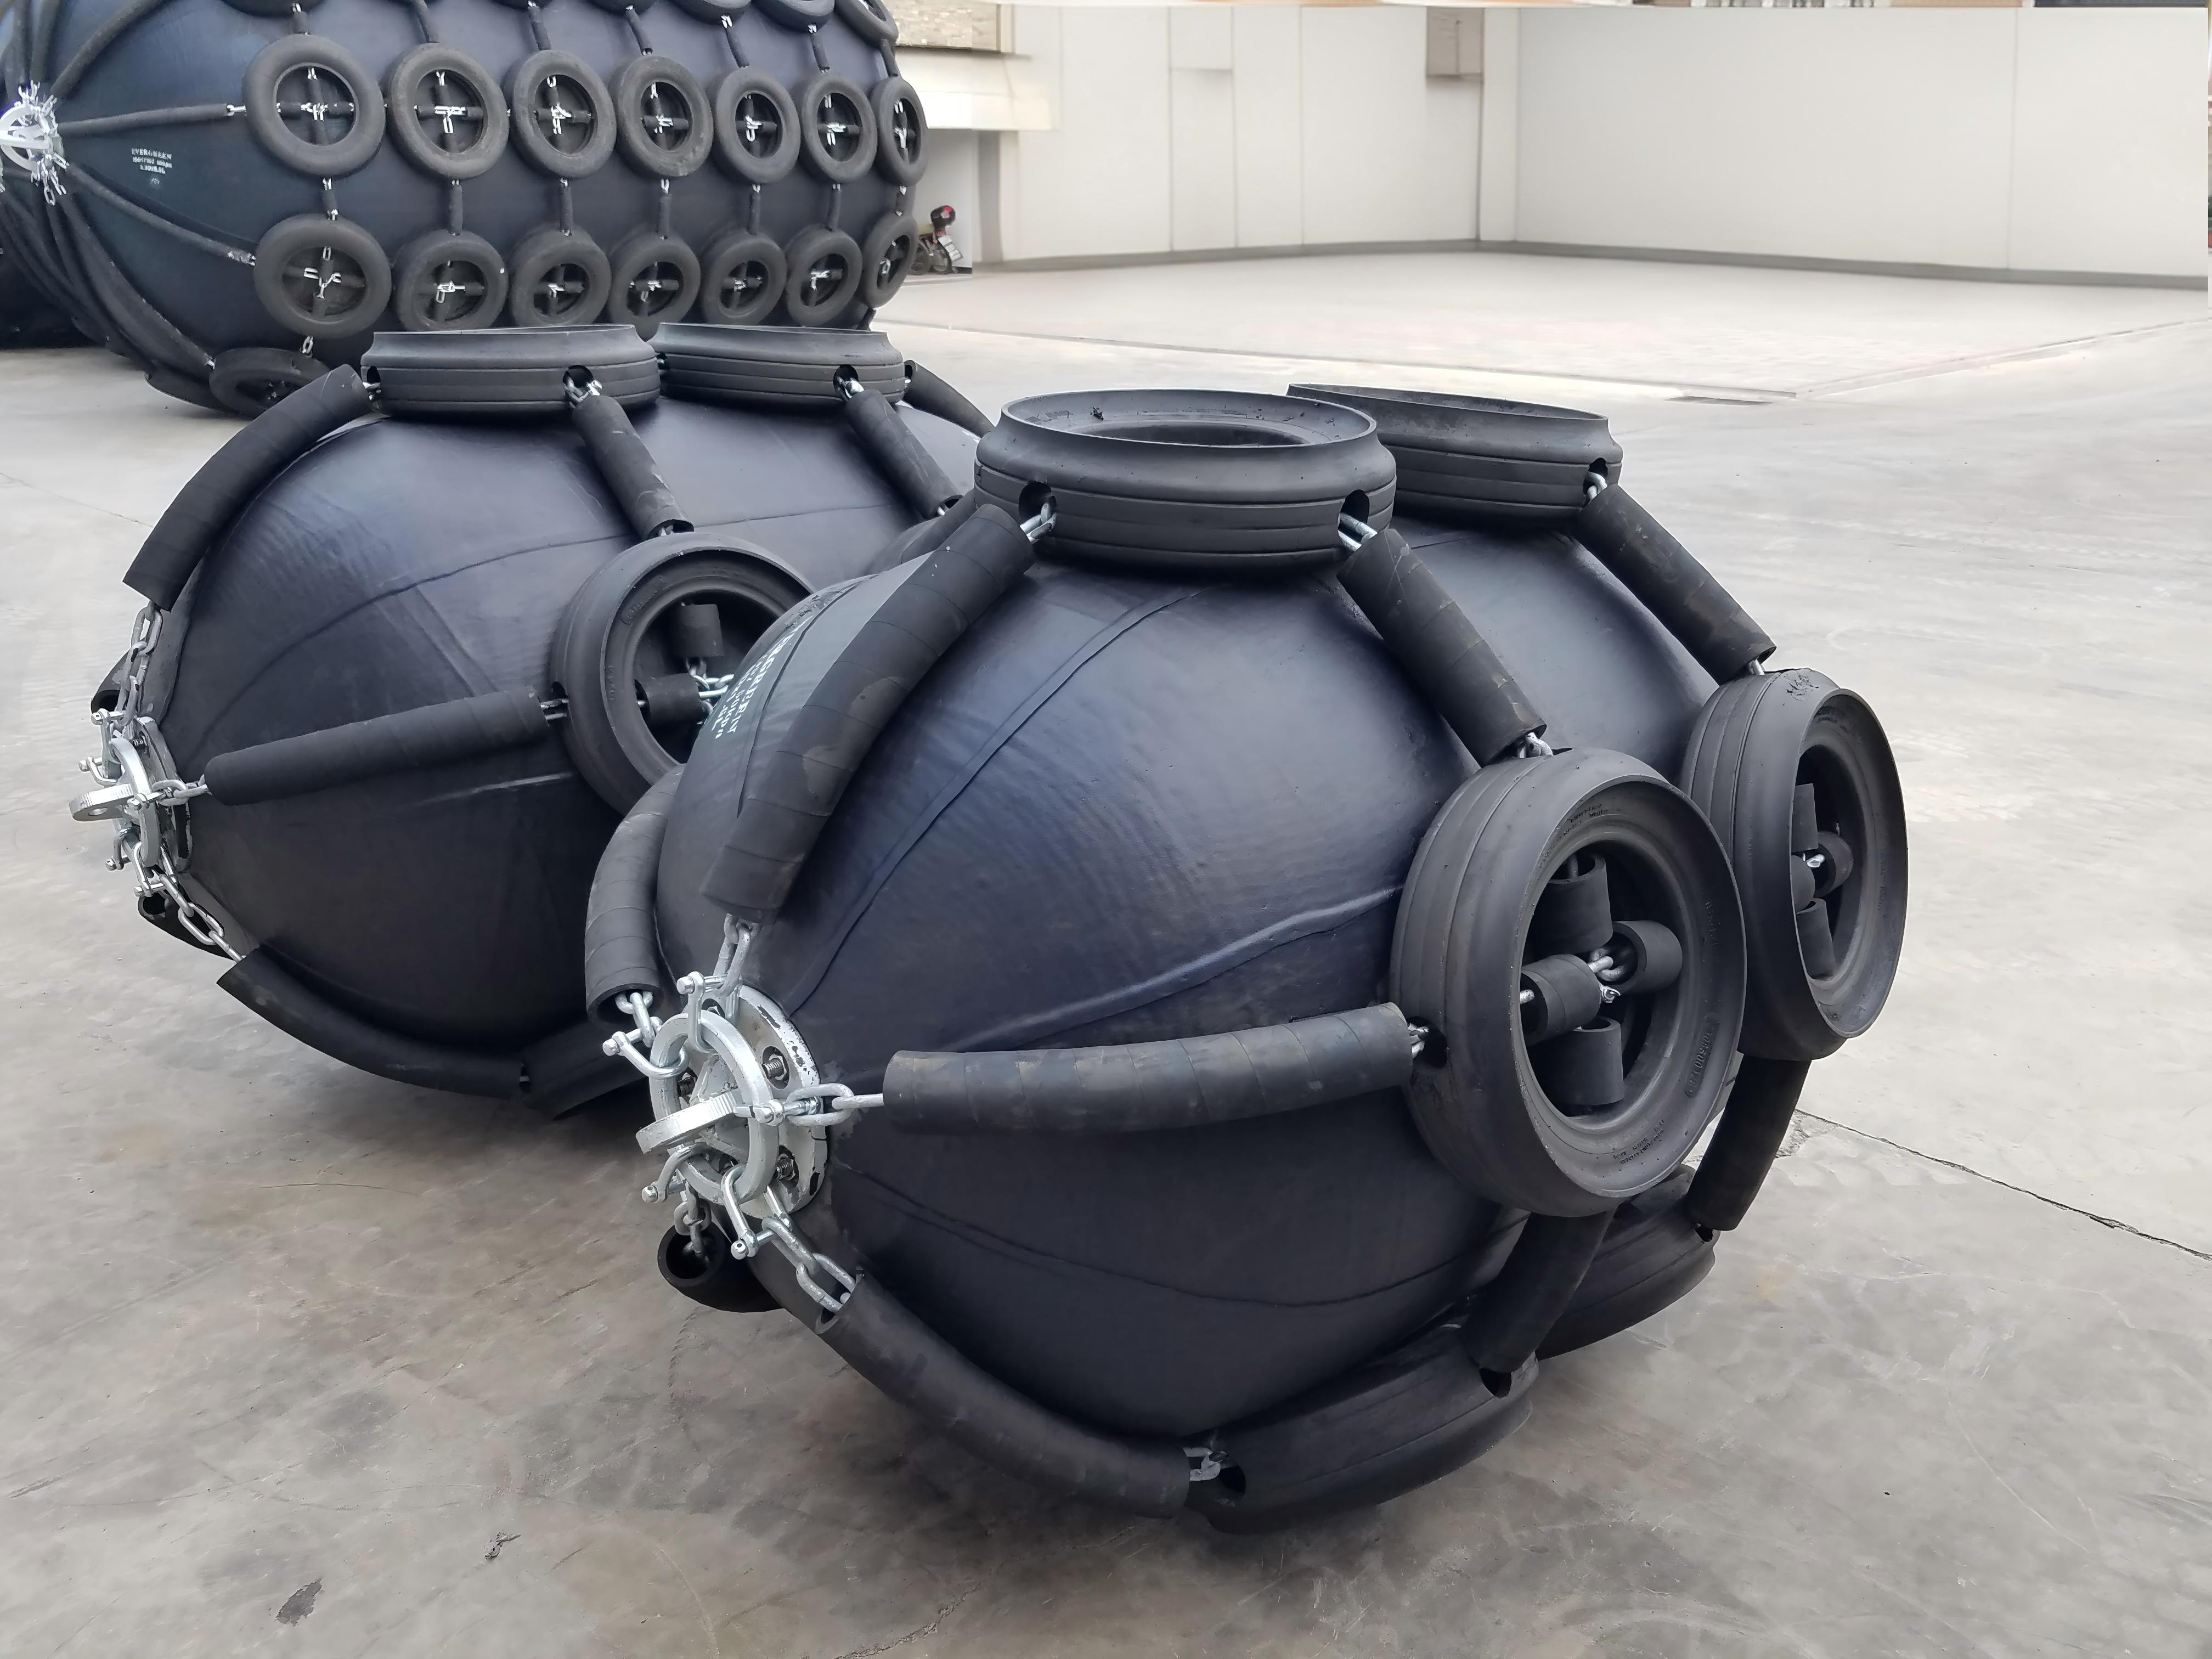
Yes, in most cases—especially for sling-type (Type II) fenders. However, you must verify: (a) the fender body is in good condition, (b) end fittings can handle additional load, and (c) the fender dimensions match available net sizes. Retrofit typically costs 30–50% less than purchasing a new CTN-equipped fender.
Type I (CTN) fenders are covered by a chain net, wire net, or fiber net for maximum protection. Type II (Sling Type) fenders have attachment eyes but no external net—they are lighter and easier to handle but offer less abrasion resistance.
Monthly visual inspections for obvious damage, every 3–6 months for detailed structural inspection, and every 2 years for comprehensive service including safety valve recalibration.
Hot-dip galvanized steel (Q235HDG) is standard for most applications. For extreme corrosion environments (offshore platforms, chemical terminals), specify SUS304 or SS316 stainless steel. Never mix galvanized and stainless components without isolation.
Replace the CTN when: >10% of tires are missing or severely damaged, chains show significant corrosion or broken links, rubber sleeves are worn through, or the net no longer maintains uniform tension around the fender body.
Yes, but proper storage extends service life. Store deflated to 0.2 bar, in a cool, shaded area, away from UV exposure, ozone sources (electric motors), and chemicals. Cover with breathable tarps, not plastic.
With proper maintenance: 10–15 years for the fender body, 5–8 years for the chain and tire net (depending on contact frequency and environmental conditions). Regular component replacement extends overall system life.
Installing a chain and tire net for Yokohama fenders is not a "bolt-on accessory" task. It's a precision operation that determines whether your pneumatic fender delivers 3 years of service or 15. The difference lies in proper material selection, meticulous installation technique, and disciplined maintenance.
For OEM brands and distributors, sourcing CTN-equipped fenders from a manufacturer with ISO 17357 certification, in-house testing capabilities, and proven export experience ensures your customers receive equipment that performs to specification—every time.
Ready to source high-quality chain and tire net pneumatic fenders? Contact NANJING TAIDUN MARINE EQUIPMENT ENGINEERING CO.,LTD to discuss your project requirements, request technical documentation, or explore OEM manufacturing partnerships.


